Creating a custom domain for your Hashnode blog
Hashnode is a great platform for blogging, and creates a lot of sane defaults so you can get started quickly without having to make a lot of design choices, but you'll pretty quickly want to start making changes and making your blog your 'own'. One of the quickest, easiest, and slickest changes you can make is converting from the hashnode default domain, which can be a little clumsy to share, to your personal custom domain. To do this:
Register a domain with your provider of choice. I already had a top-level domain registered via AWS Route 53 (mivancic.com), and I remember that process being pretty quick and painless, especially if you're already working in AWS, but a domain from Cloudflare, Netcheap, or similar will work just fine
Select the custom URL your blog will redirect to. I opted for the simple blog.mivancic.com
Navigate to the Dashboard page for your Hashnode blog and select 'Domain'. You will be prompted with a window similar to the below:

Enter the desired domain into the field and select 'Update'
Once the custom domain has been update on Hashnode's end, you will still need to create a DNS record with your domain provider before your blog will be available from the new address. In my case, this record looked like this:
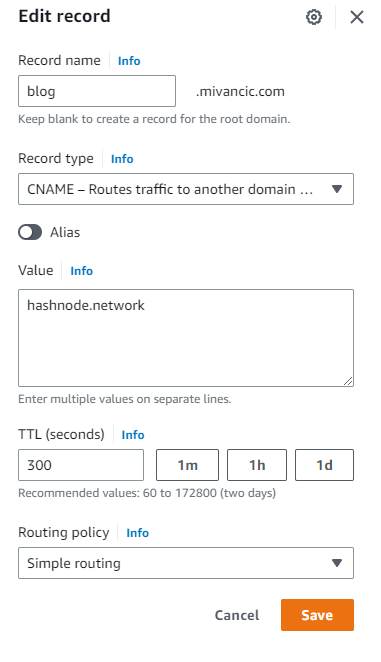
And that's about it. Hashnode warns you that it may take up to 24 hours for your CNAME record to propagate to Hashnode's servers and for them to issue the SSL cert they need to be able to route traffic accordingly, but in my experience with Route53, it was essentially instantaneous.
And with that, you've added a custom domain name to your blog. Have you done this for your own? Did you use a different DNS provider? How long did it take for your records to propagate accordingly? Let me know in the comments, I'd love to learn from your experiences.